Add webchat to your website
Create a webchat, authorize its website and retrieve the generated embed code or standalone link.
Webchat provides a browser-based conversation with your bot. Create it in Bual Pro, select the allowed website and use the code generated for that webchat.
Create a webchat
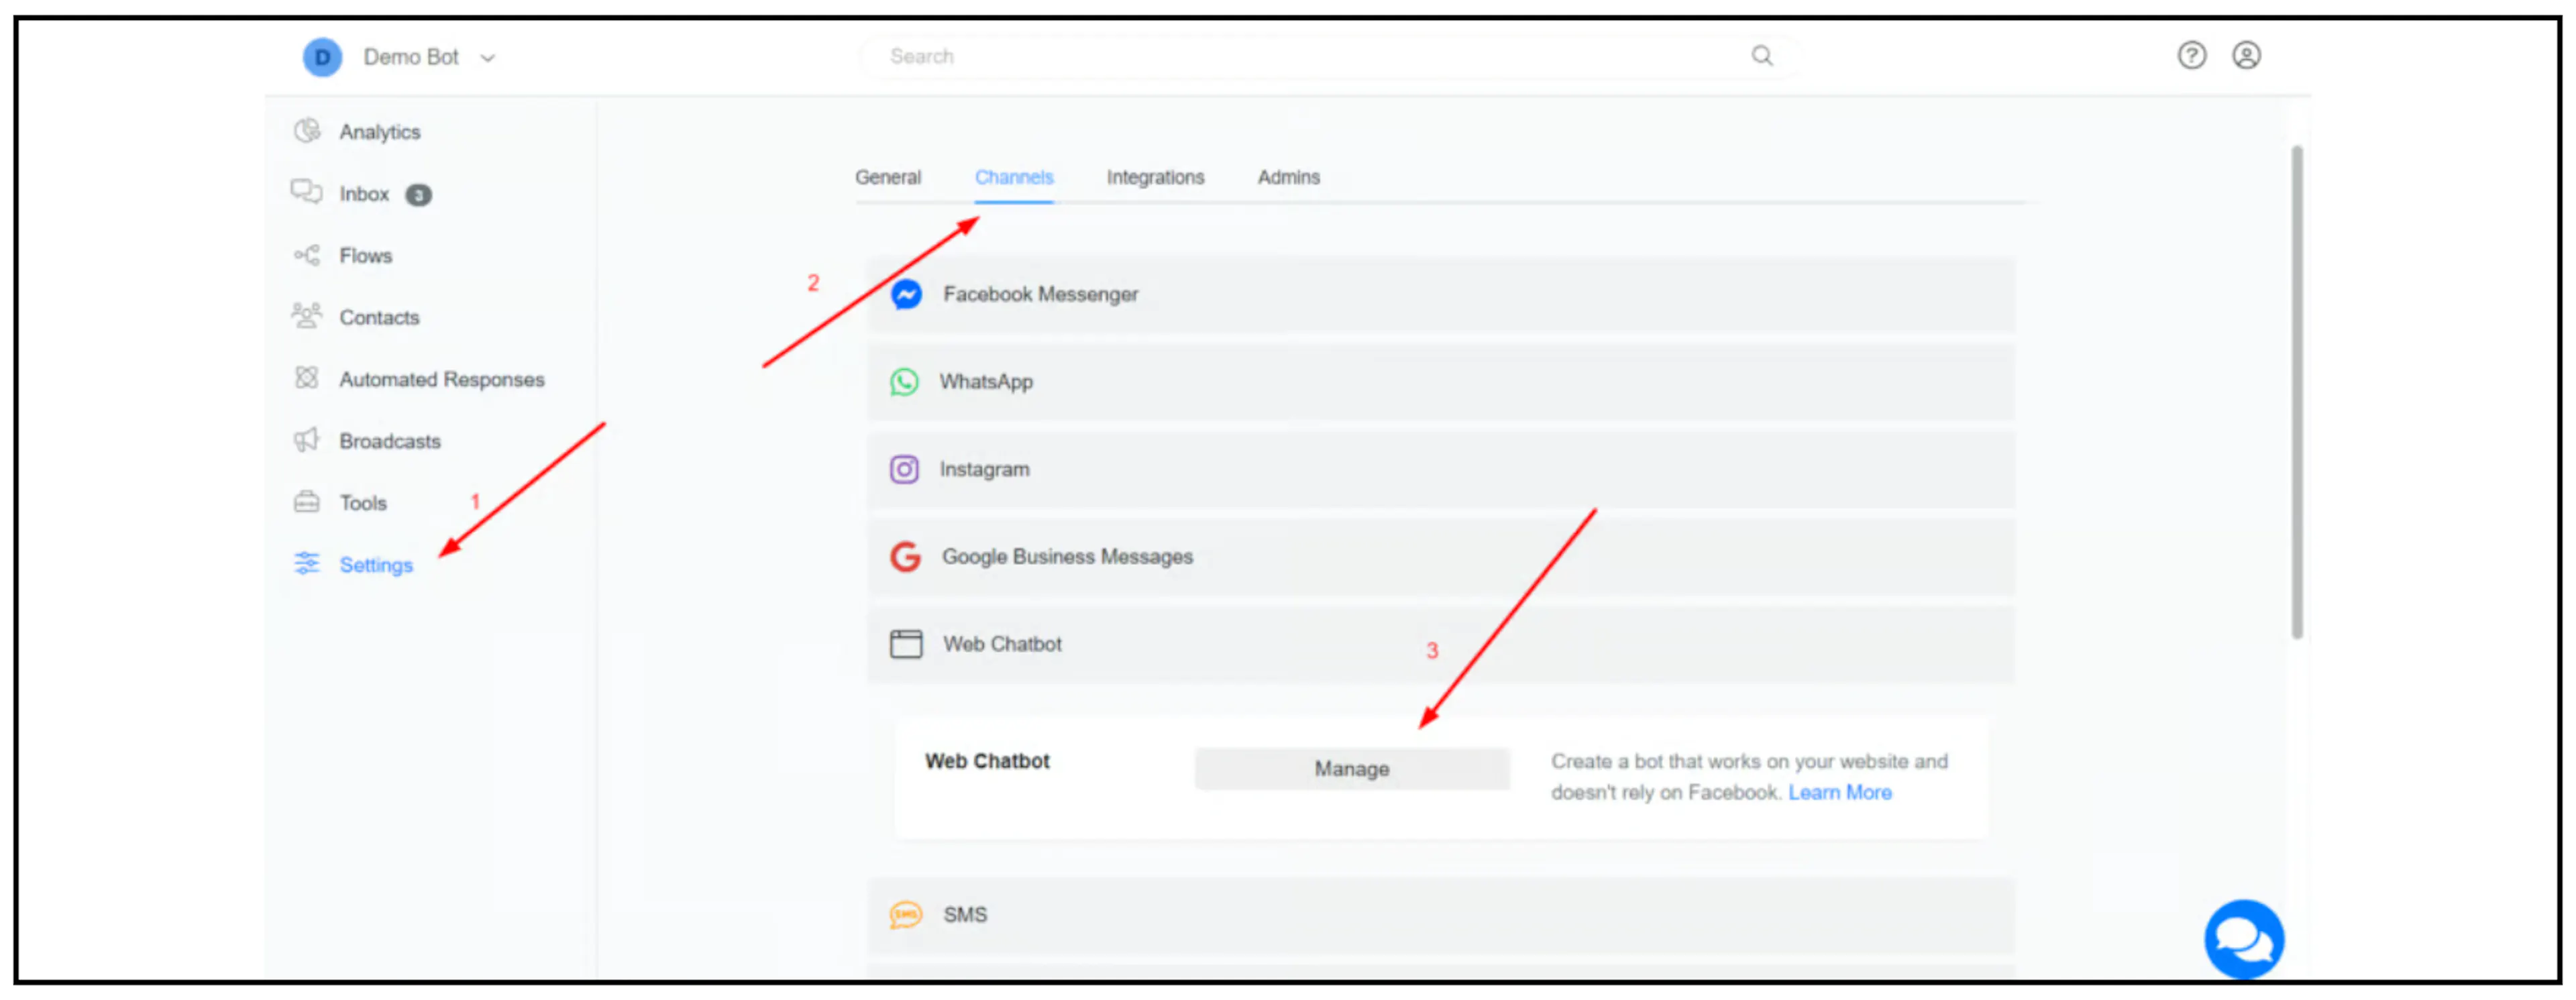
Open Settings > Channels, find Webchat or Web Chatbot, and select Manage.
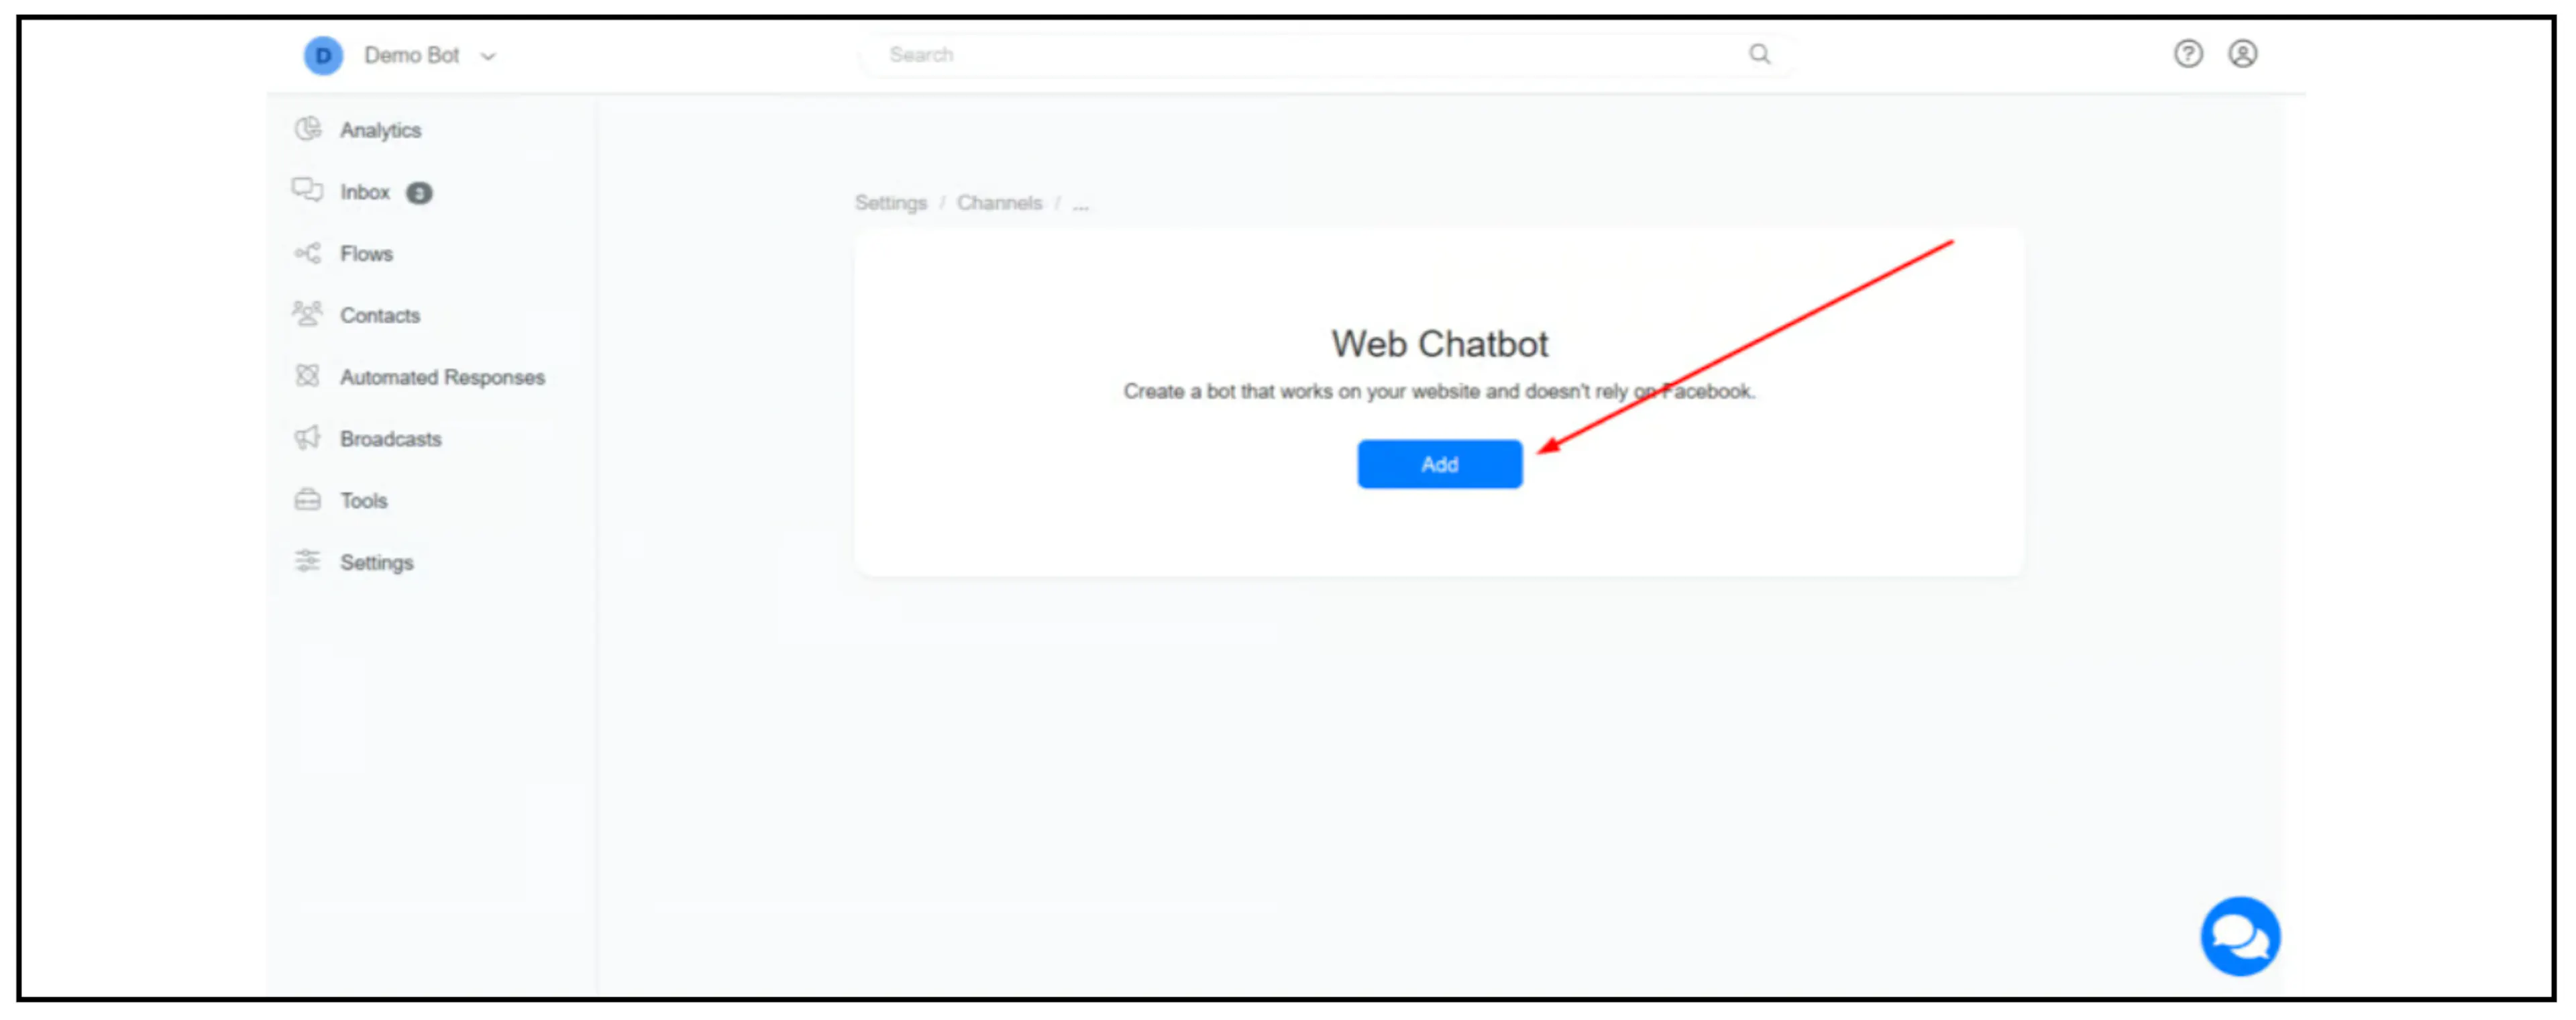
Select Add to create the webchat.
Enter its name and review the available welcome-message and conversation-starter settings. Add the intended domain or subdomain under Authorized websites, then select Save.
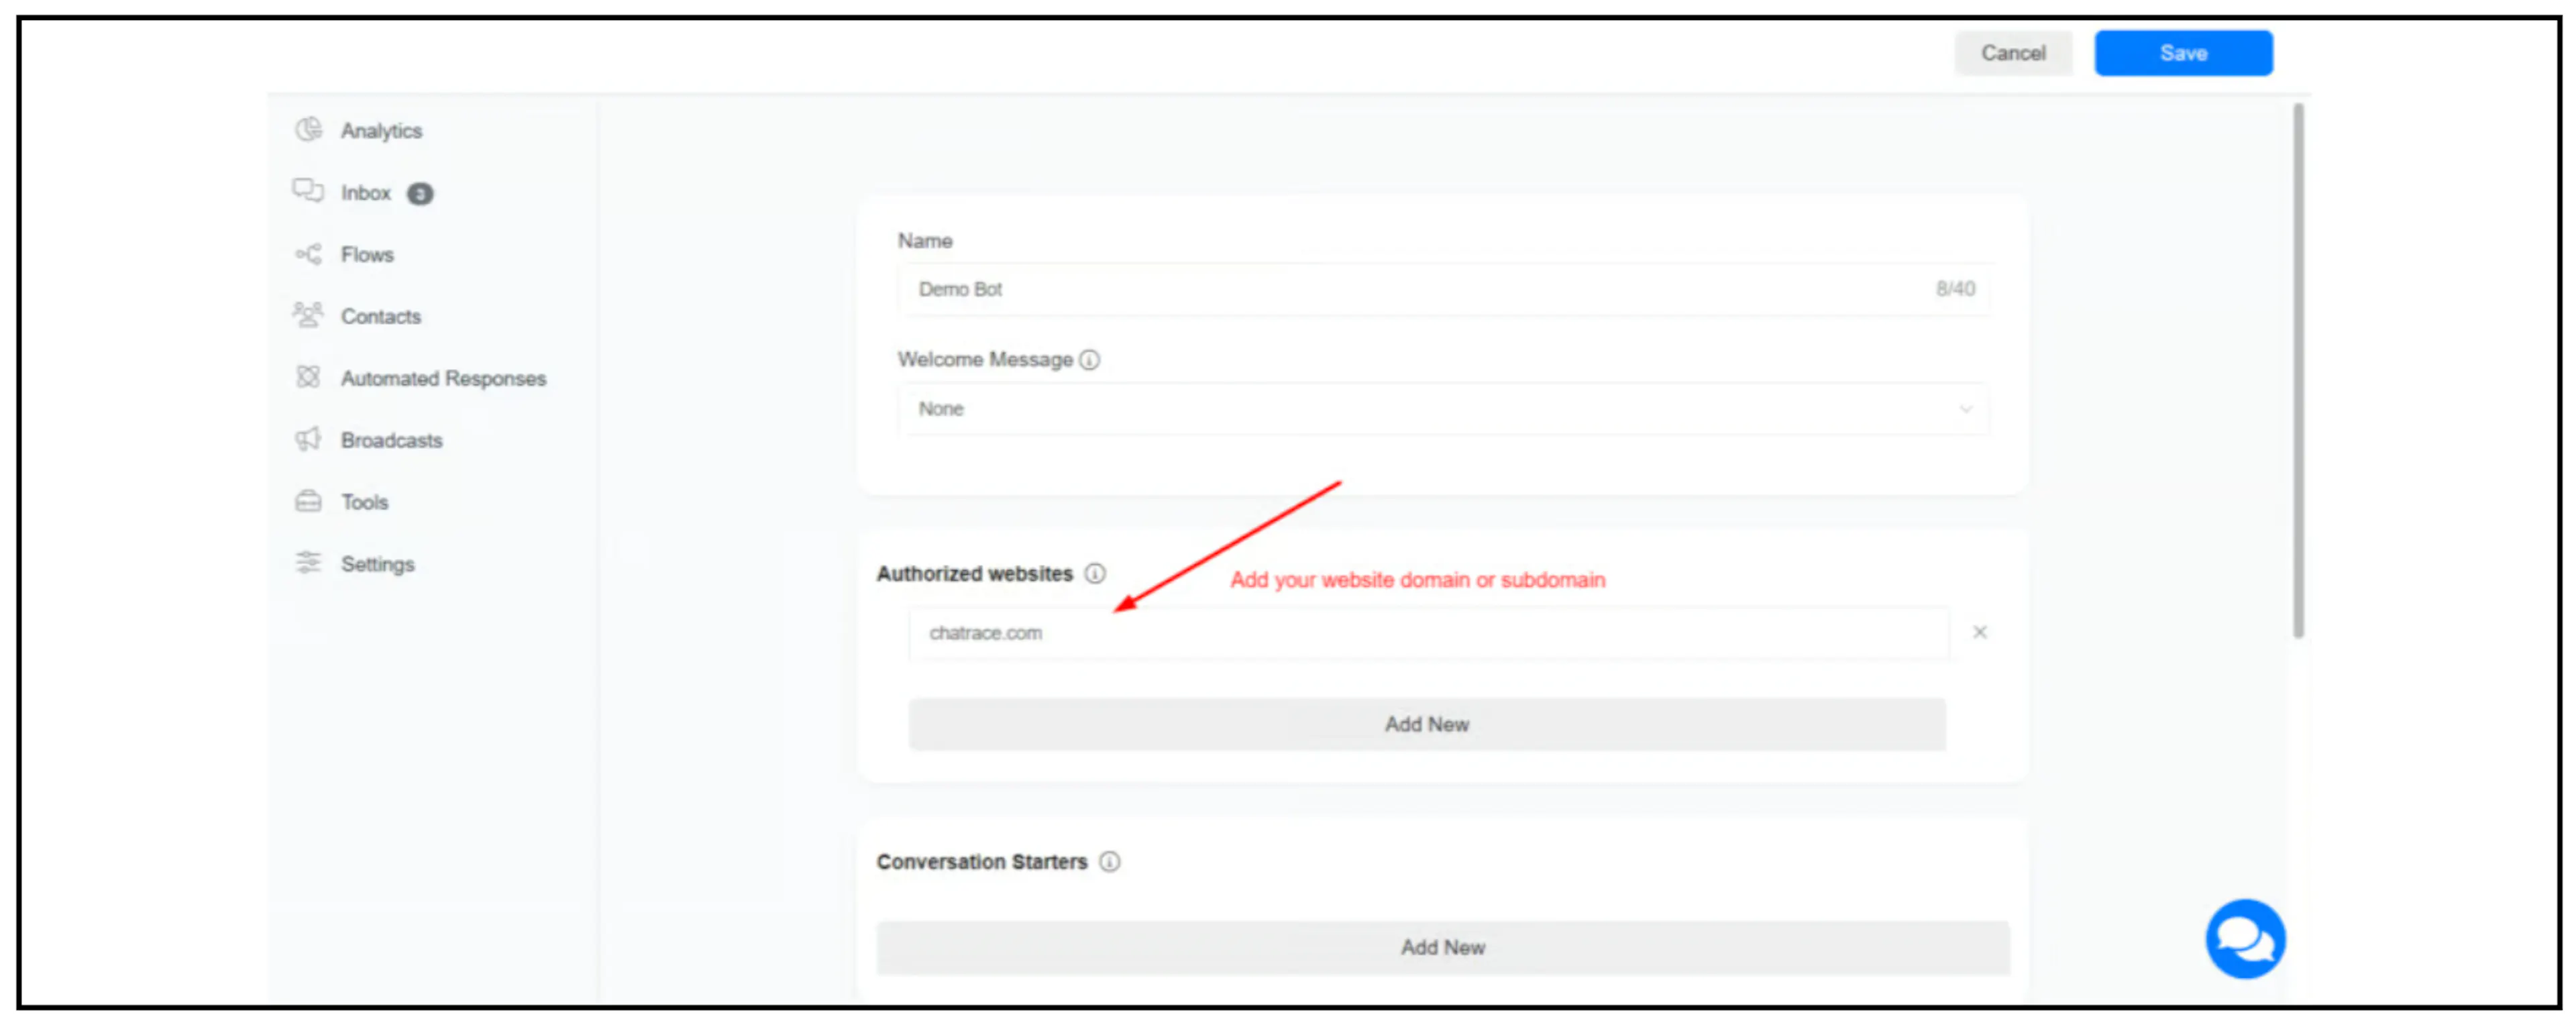
The earlier guide describes Authorized websites as the list of sites allowed to load the widget. Check how the current interface expects domains, subdomains and any staging site to be entered. Do not assume one entry covers every subdomain.
Retrieve the embed code
Find the saved webchat, open its three-dot menu and select Get Code.
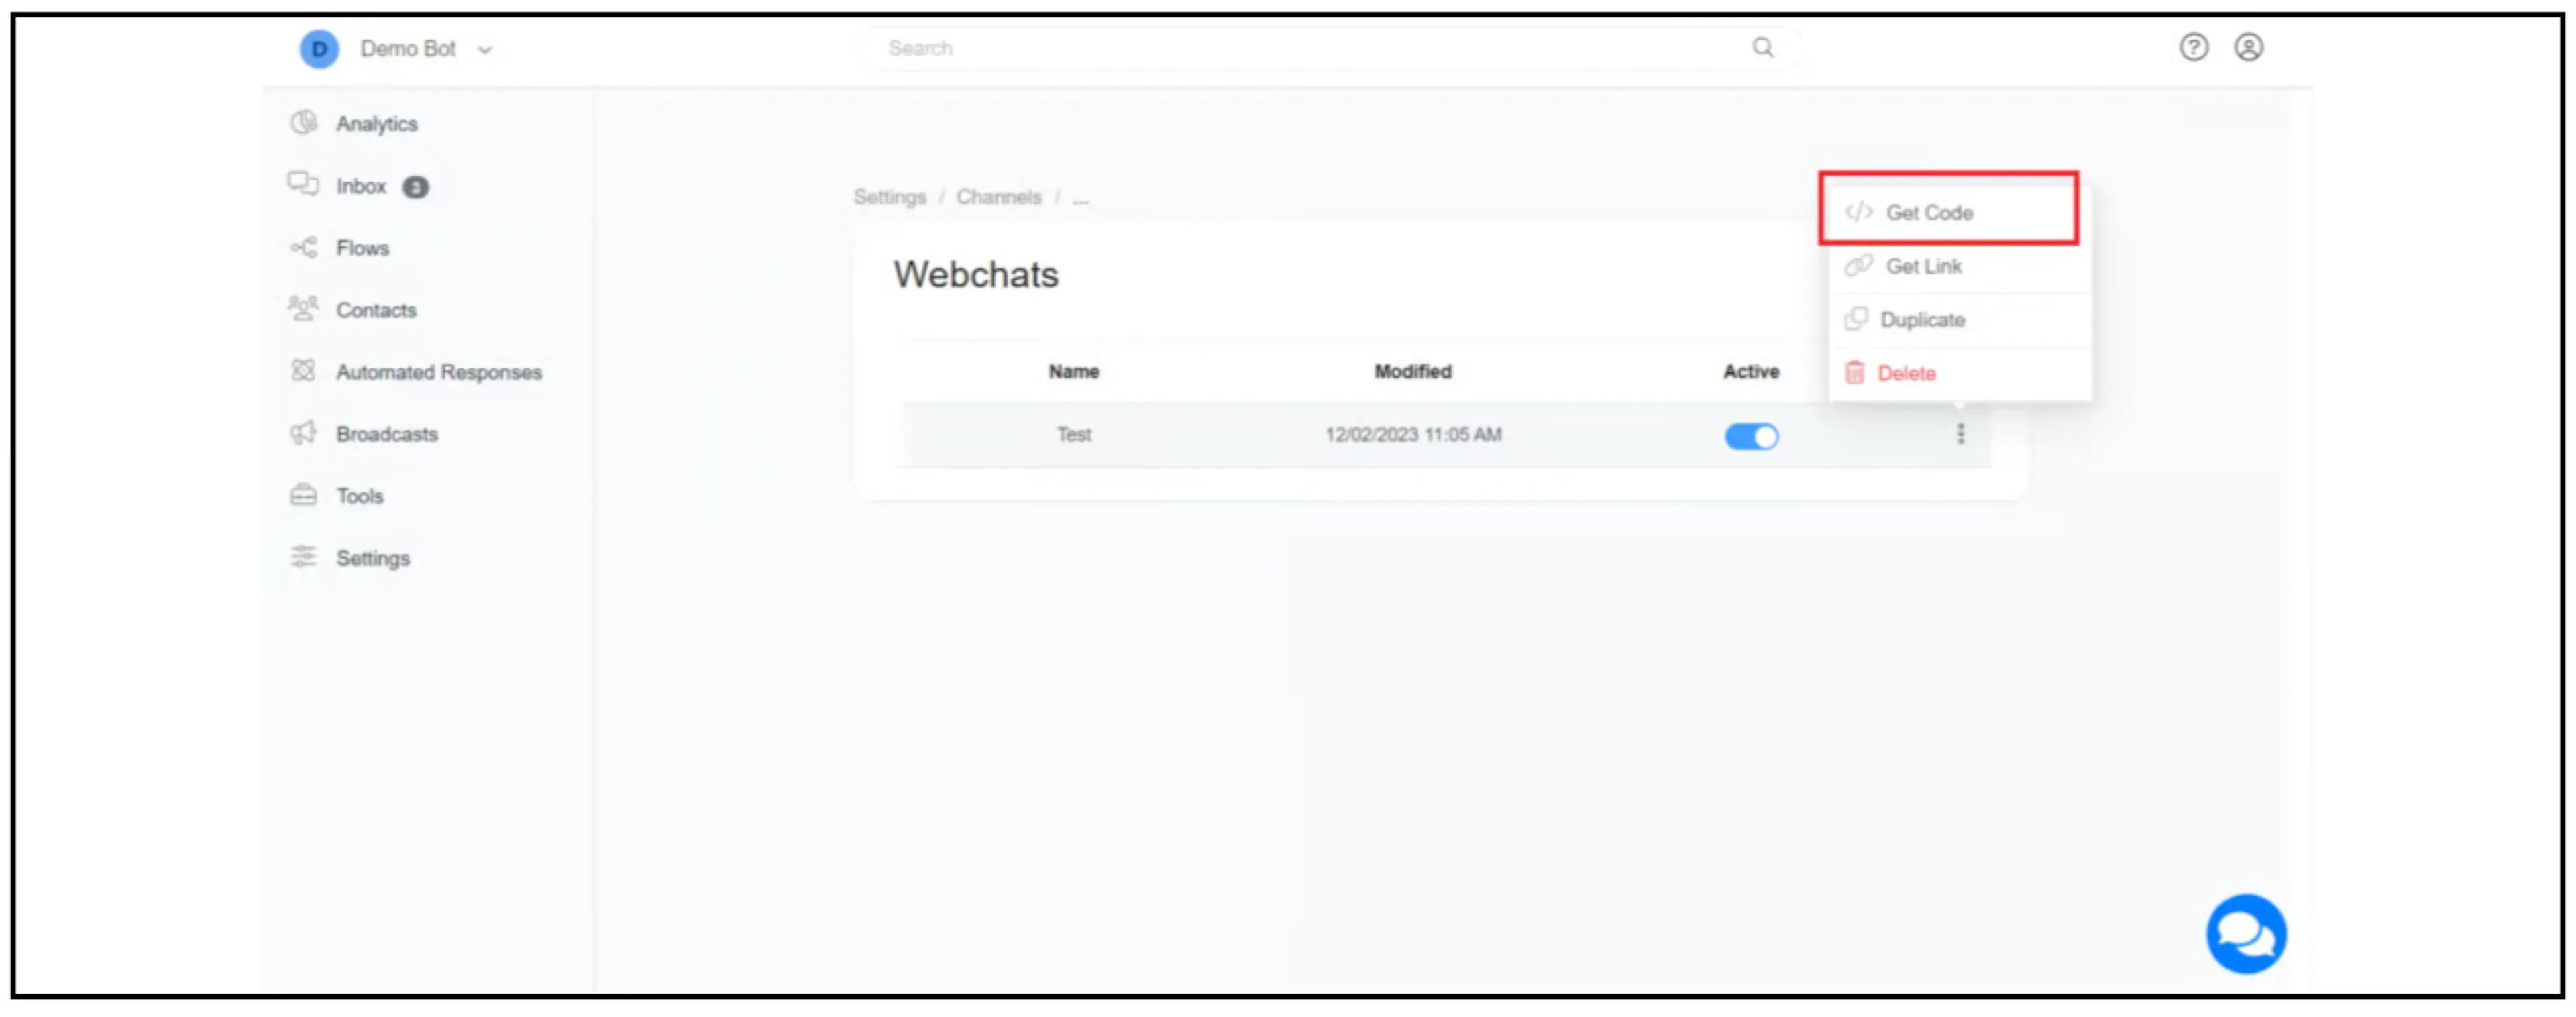
Copy the generated snippet and have your website maintainer add it through the website's supported custom-code integration. Use the current generated code for this account. The source walkthrough does not provide a complete embed snippet to reproduce here.
Check that the webchat is active, loads on the authorized website and displays correctly on desktop and mobile. Confirm its conversation behavior in a controlled test before offering it to customers. Installing the widget and configuring its bot replies are separate steps.
If it does not appear, check the webchat's active state, authorized website entry and installed code. Ask your maintainer to check any site restrictions on third-party scripts or embedded content. Contact Bual Pro support if the generated code or current domain requirements are unclear.
Use a standalone page
Select Get Link from the saved webchat's menu to retrieve its standalone conversation URL. Use the generated link for the account instead of rebuilding a route from an old example.
For a website demo with a displayed page behind the chat, see Bot Simulator.
Review customization options
The earlier guide includes the options below. Confirm that the current generated snippet supports them and use its documented syntax. These names are a reference for the older webchat; they do not establish the current defaults.
| Option | Purpose in the earlier guide |
|---|---|
type | Display mode: floating, window or container. |
element | HTML element selector when type is container. |
headerTitle | Text shown in the webchat header. |
color | Chat color, supplied as a color name or code. |
hideHeader | Whether to hide the header. |
ref | Entry, flow or step reference used when the chat starts. The guide also lists get_started_button for the welcome flow. |
showPersona | Whether to display the account image beside bot messages. |
hideComposer | Whether to hide the message composer. |
template | Visual template selection. The reference table lists template1 and template2. |
icon | Chat launcher icon. |
right | Horizontal launcher offset; confirm the direction and units in the current implementation. |
bottom | Bottom launcher offset; confirm the accepted units. |
loadMessages | Whether to load earlier messages when the webchat opens. |
setCustomFields | Initial field values using field IDs or supported system-field names. |
The older article's template count conflicts with its option table, and the description of right refers to the left edge. Check the available templates and actual placement before using those settings. Avoid copying old defaults into a new generated snippet without checking them.
Browser-supplied custom fields can be changed by the visitor. Confirm accepted field names and data format; do not use them as proof of identity or permission to access an external account.
Continue a conversation in webchat
The earlier guide uses the system field {{webchat}} in a message to provide a contact with a webchat link. Confirm that the field is available and resolves correctly for your channel and account.
It documents appending a flow or step reference like this:
{{webchat}}&ref=111111
Here, 111111 is the source's example ID. Use the intended flow or step ID from your account and check the generated link format before adding parameters.
The guide also documents lc=0 to avoid loading earlier messages:
{{webchat}}&ref=111111&lc=0
Confirm current behavior before relying on either parameter. Check whether the contact-specific link loads conversation history and send it only to its intended recipient. Do not publish it as a general website entry link. Hiding earlier messages is a display choice; it does not establish deletion or an access-control boundary.
Check the resulting conversation, field mapping and selected flow before using this handover with customers. The examples do not prove that every channel transfers the same history or contact identity.