Create a poll
Set up poll choices, dates and an optional flow after voting.
Use Tools > Polls to create a poll with named choices. The earlier guide describes Messenger use; confirm the current channel and entry method for your account before distributing it.
Add the poll
Open Tools > Polls and select Add Poll.
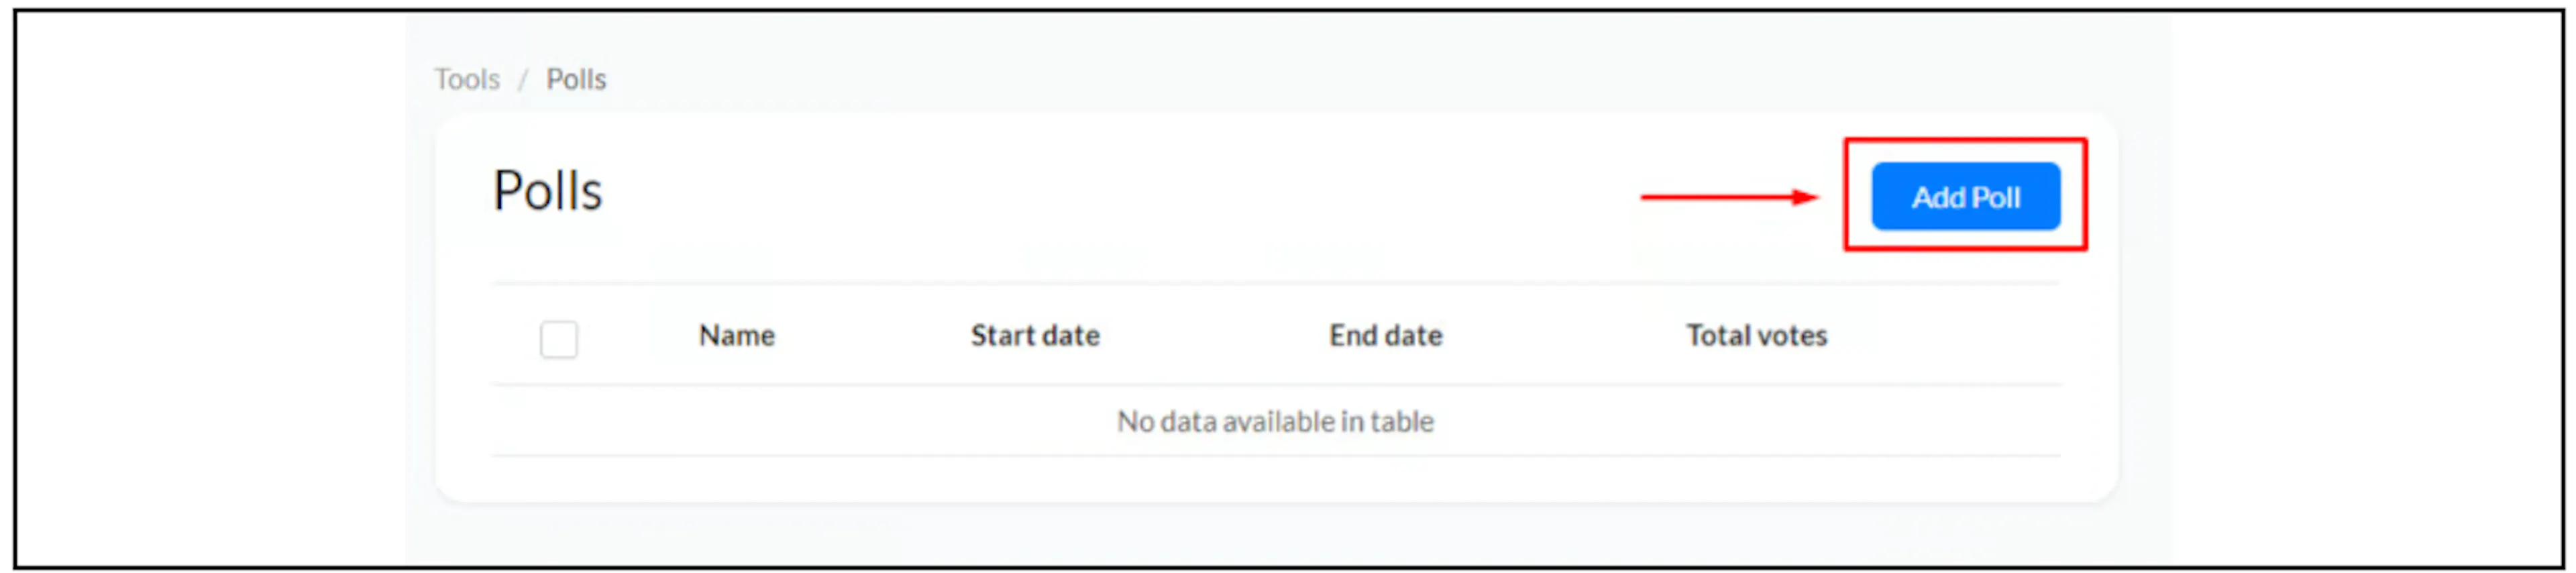
Complete the poll settings:
| Setting | What to enter |
|---|---|
| Name | The poll campaign name. |
| Start date / End date | When the poll should be available. Check the time zone used by your account. |
| Poll image URL | The link to the poll's main image. |
| Candidate or Options | The choices contacts can vote for. |
| Candidate Name, Image URL and Description | The details for each choice. The screenshot marks descriptions optional. |
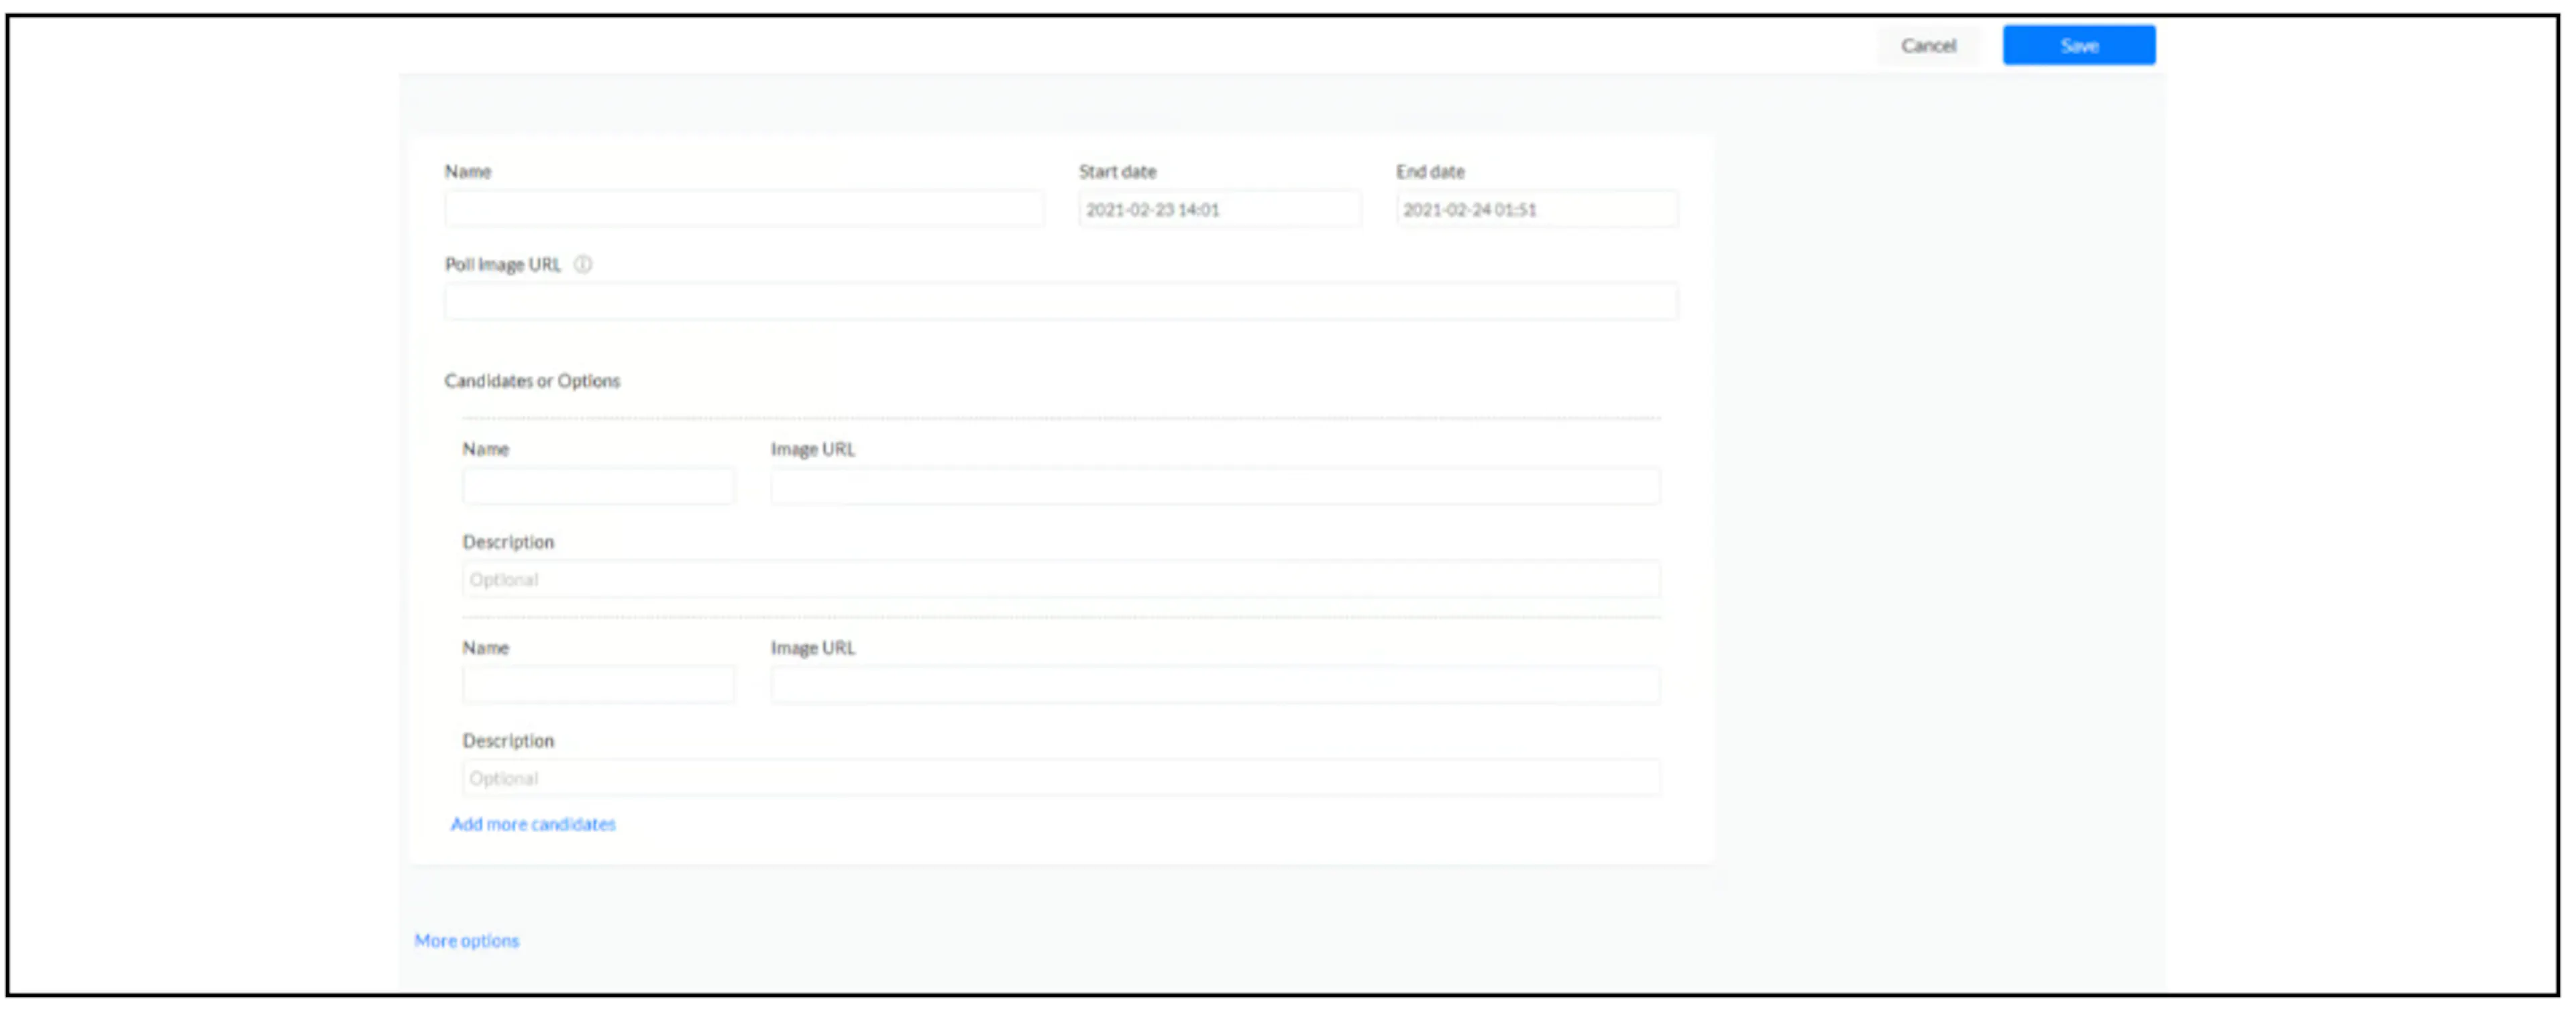
Use Add more candidates for additional choices. If the image is on your device, upload it through the available image control and use the resulting link.
Review optional settings
Under More Options, review Rank and Flow After the Vote. Rank controls ordering; check the resulting order instead of assuming whether numbering starts at zero or one. Flow After the Vote selects a follow-up flow and is optional.
Select Save when the settings are ready.
Check voting before sharing
Confirm the opening/closing dates, displayed choices, images and selected follow-up flow. Test the current voting entry method and outcome before sharing the poll with customers.
For a Facebook comment entry method, ask Bual Pro support to confirm the current connection and voting-flow setup before sharing it.