Appointment scheduling
Create a calendar, set availability and share an appointment booking link.
Create a Bual Pro calendar so contacts can choose an available appointment time. Review availability and notification flows before sharing the booking link.
Create a calendar
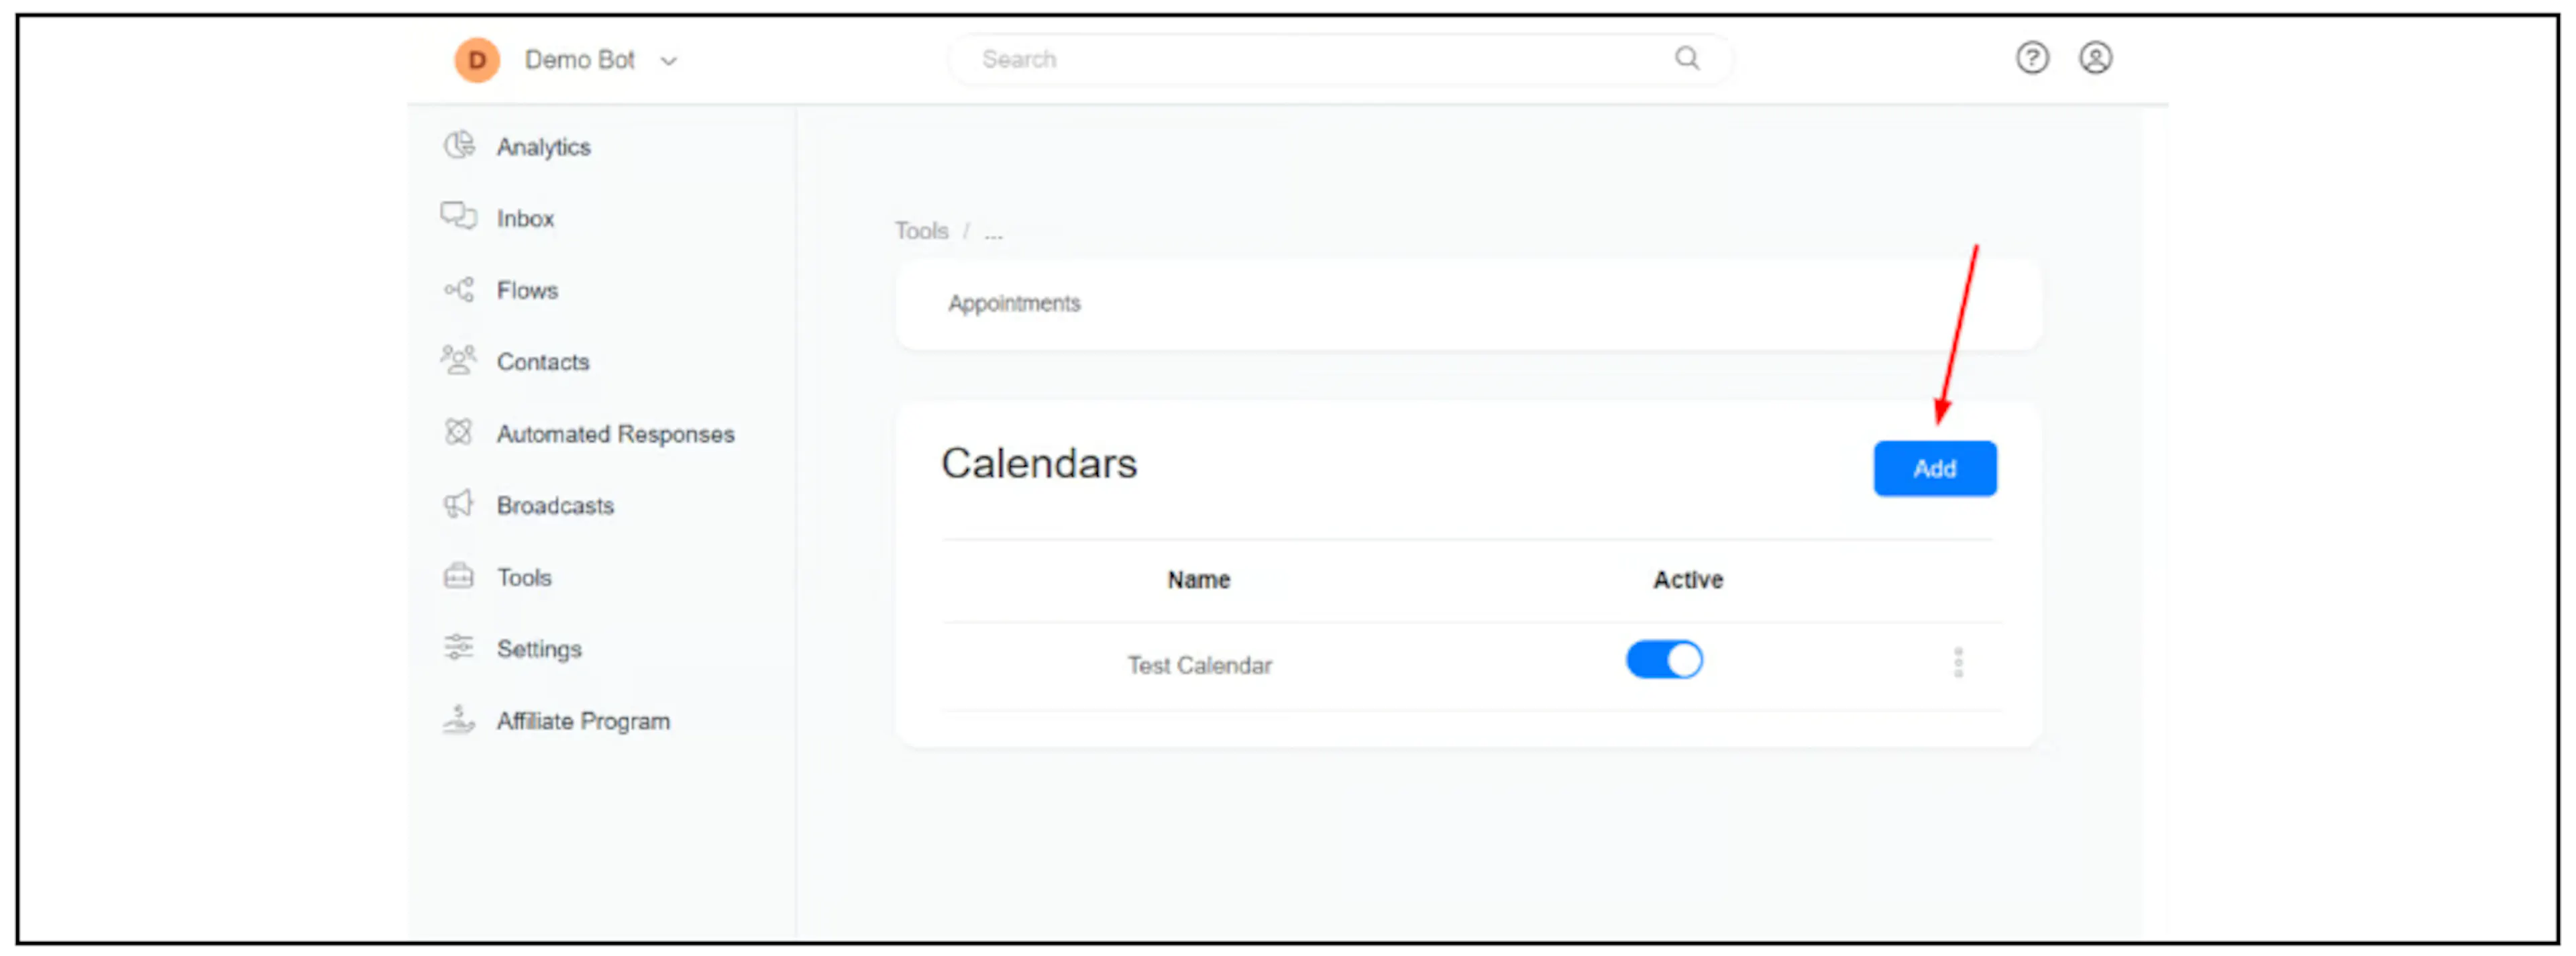
- Open Tools > Appointment Scheduling.
- Select Add.
- Complete the event details and set the times when people can book.
- Review the other event settings, then save the calendar.
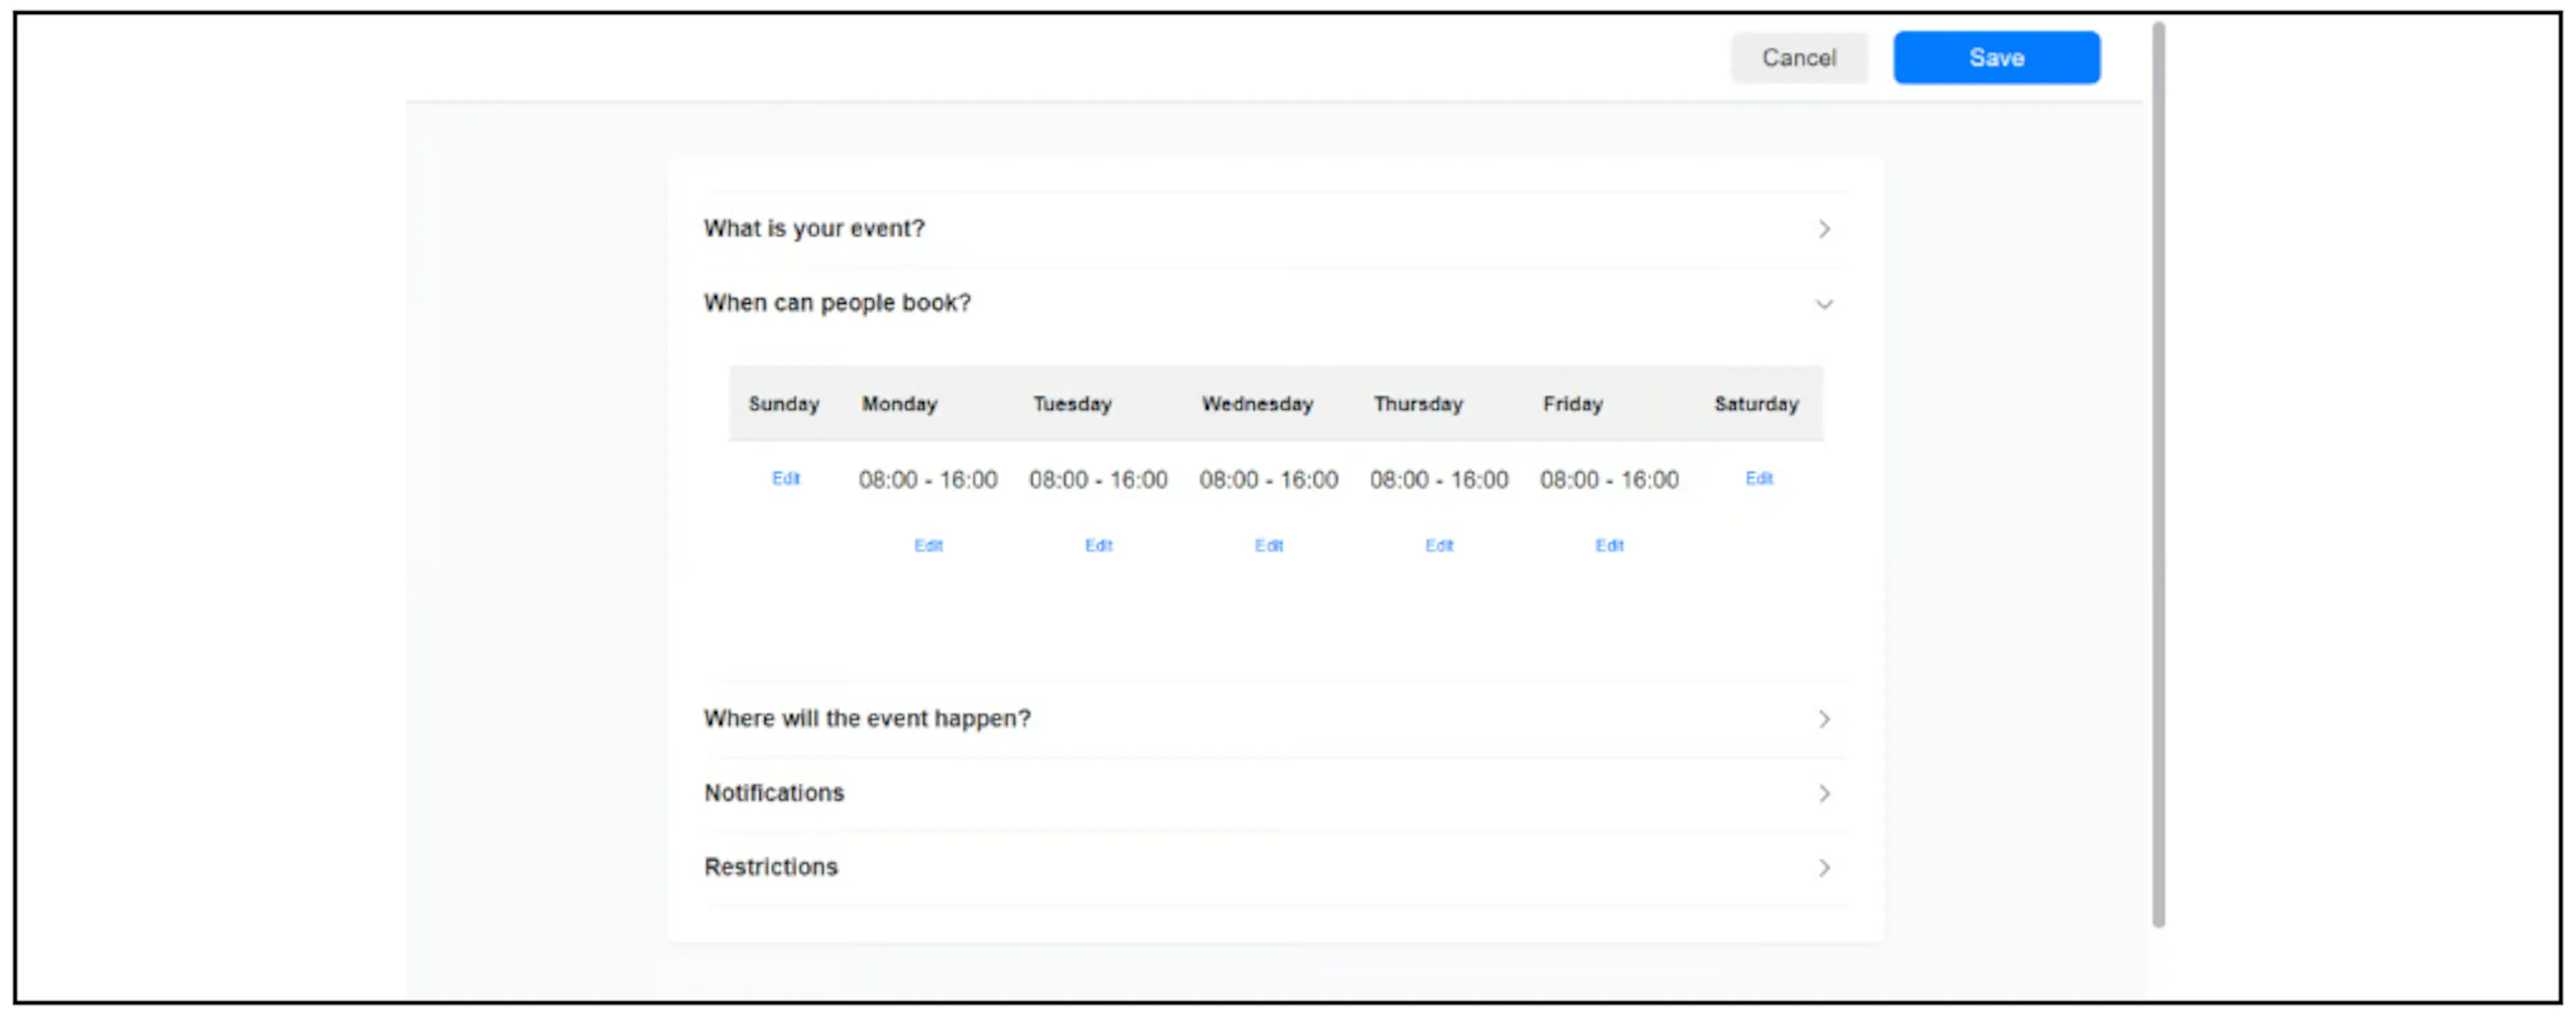
Check the booking page's time zone and the times shown to your contacts. For a Malaysian business, confirm that the availability represents the intended Malaysian local time.
Review confirmations and reminders
Open the calendar's Notifications settings to review its confirmation and reminder flows. In the illustrated interface, the calendar has a confirmation flow and several reminder entries.
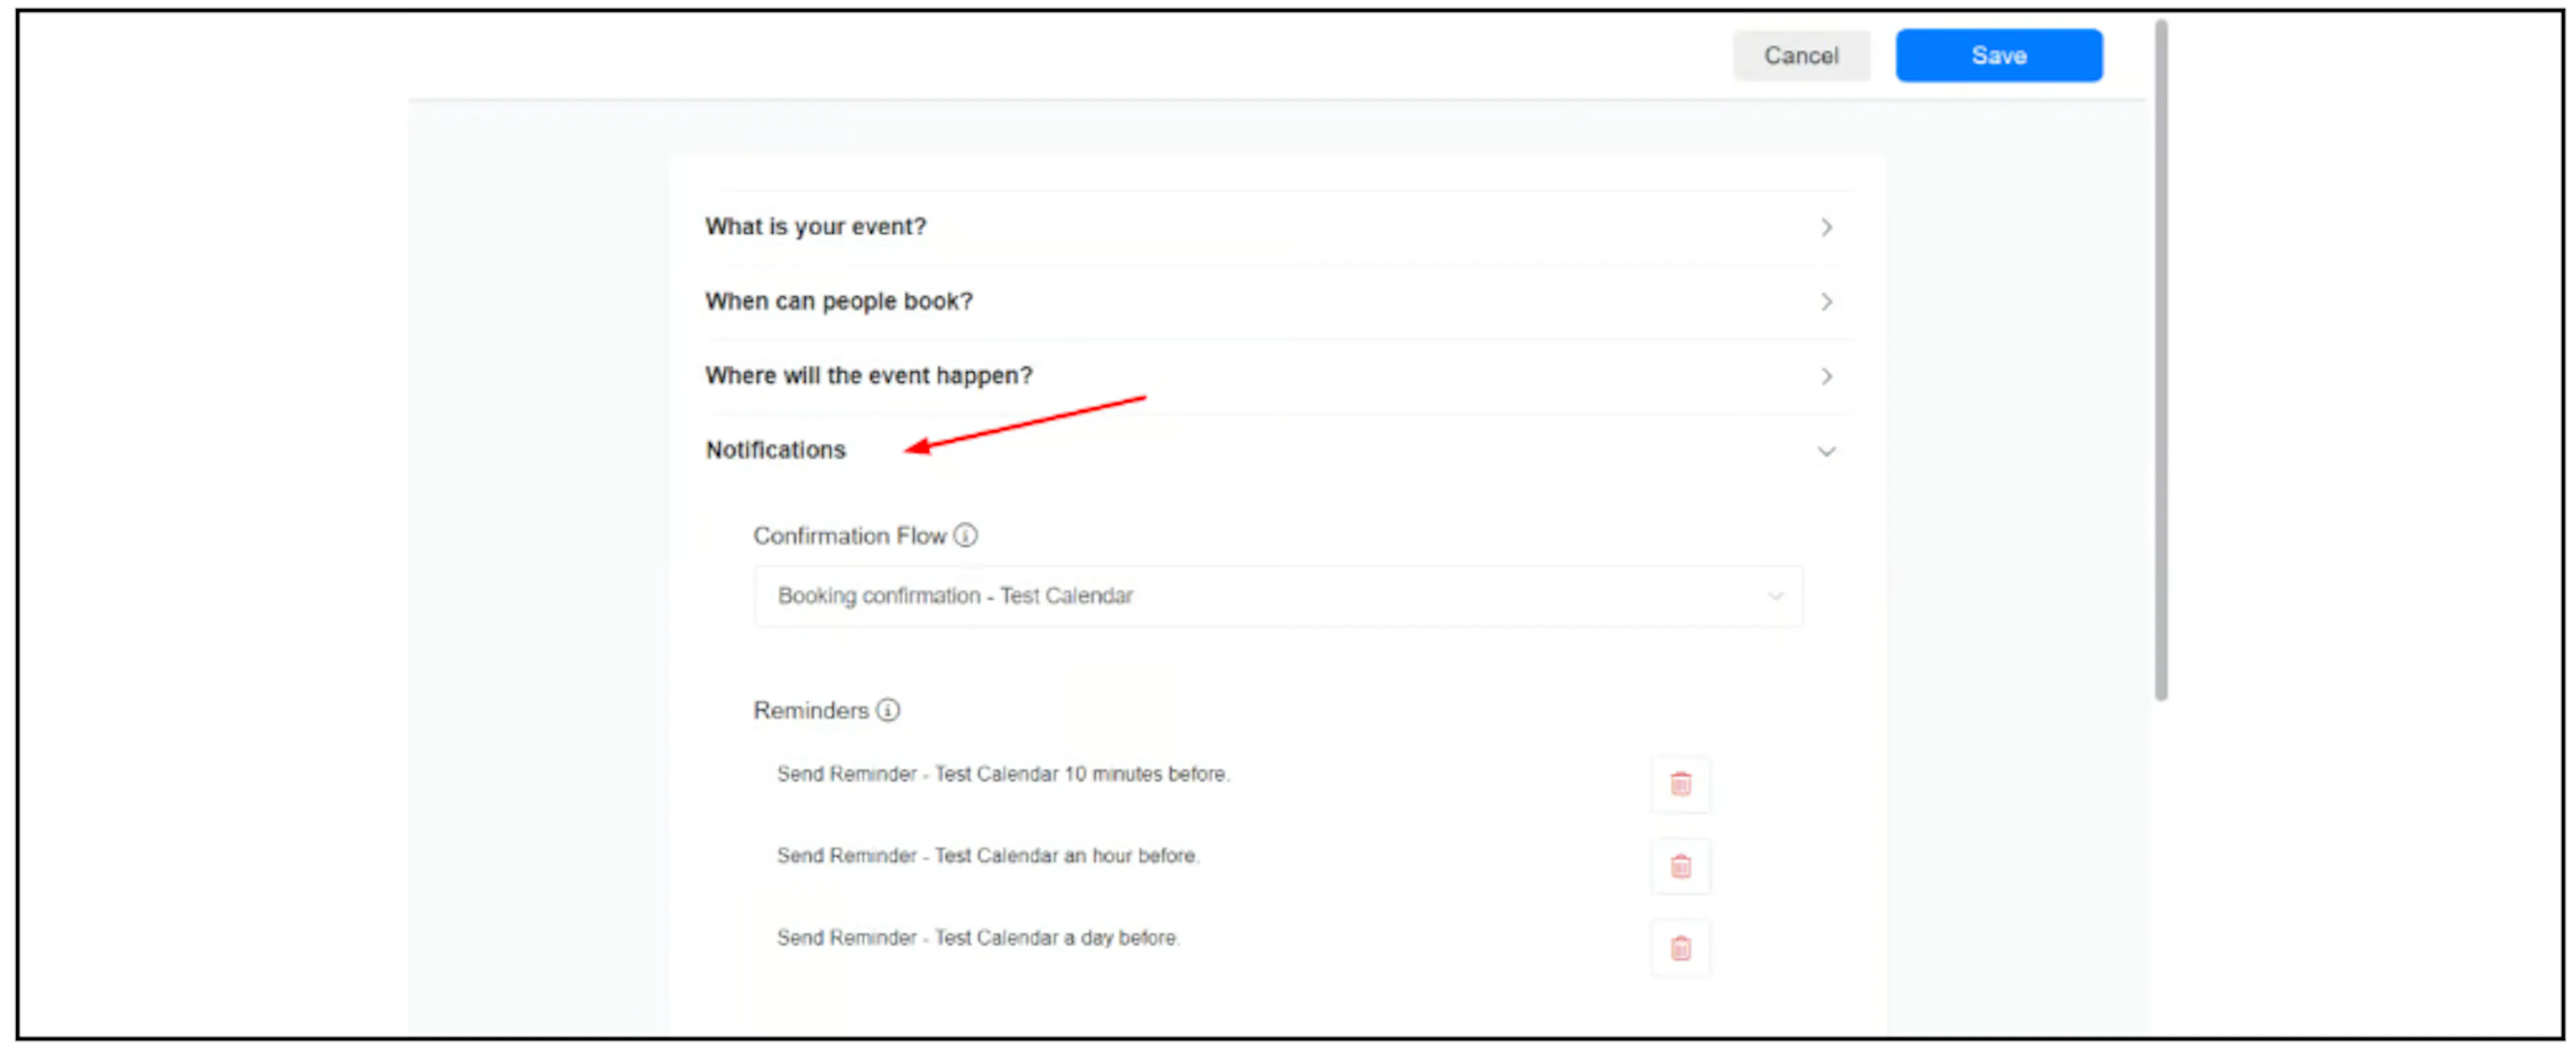
If Bual Pro creates these flows for your calendar, open them under Flows and review their messages and timing. Confirm which notifications are enabled and where they are delivered before relying on automatic reminders.
Connect an external calendar, if needed
For Google Calendar, open Settings > Integrations > Google Calendar and select Connect. For Outlook Calendar, use the corresponding Outlook integration.
Calendar connections are optional. Check the account and calendar selected, then verify that a sample booking appears there and that an existing busy period affects availability as intended.
Collect the contact's email address before booking if you want them to receive a calendar email invitation. Confirm that the invitation is delivered for the connected calendar.
Get and share the booking link
In Tools > Appointment Scheduling, open the calendar's menu and choose Get Link.
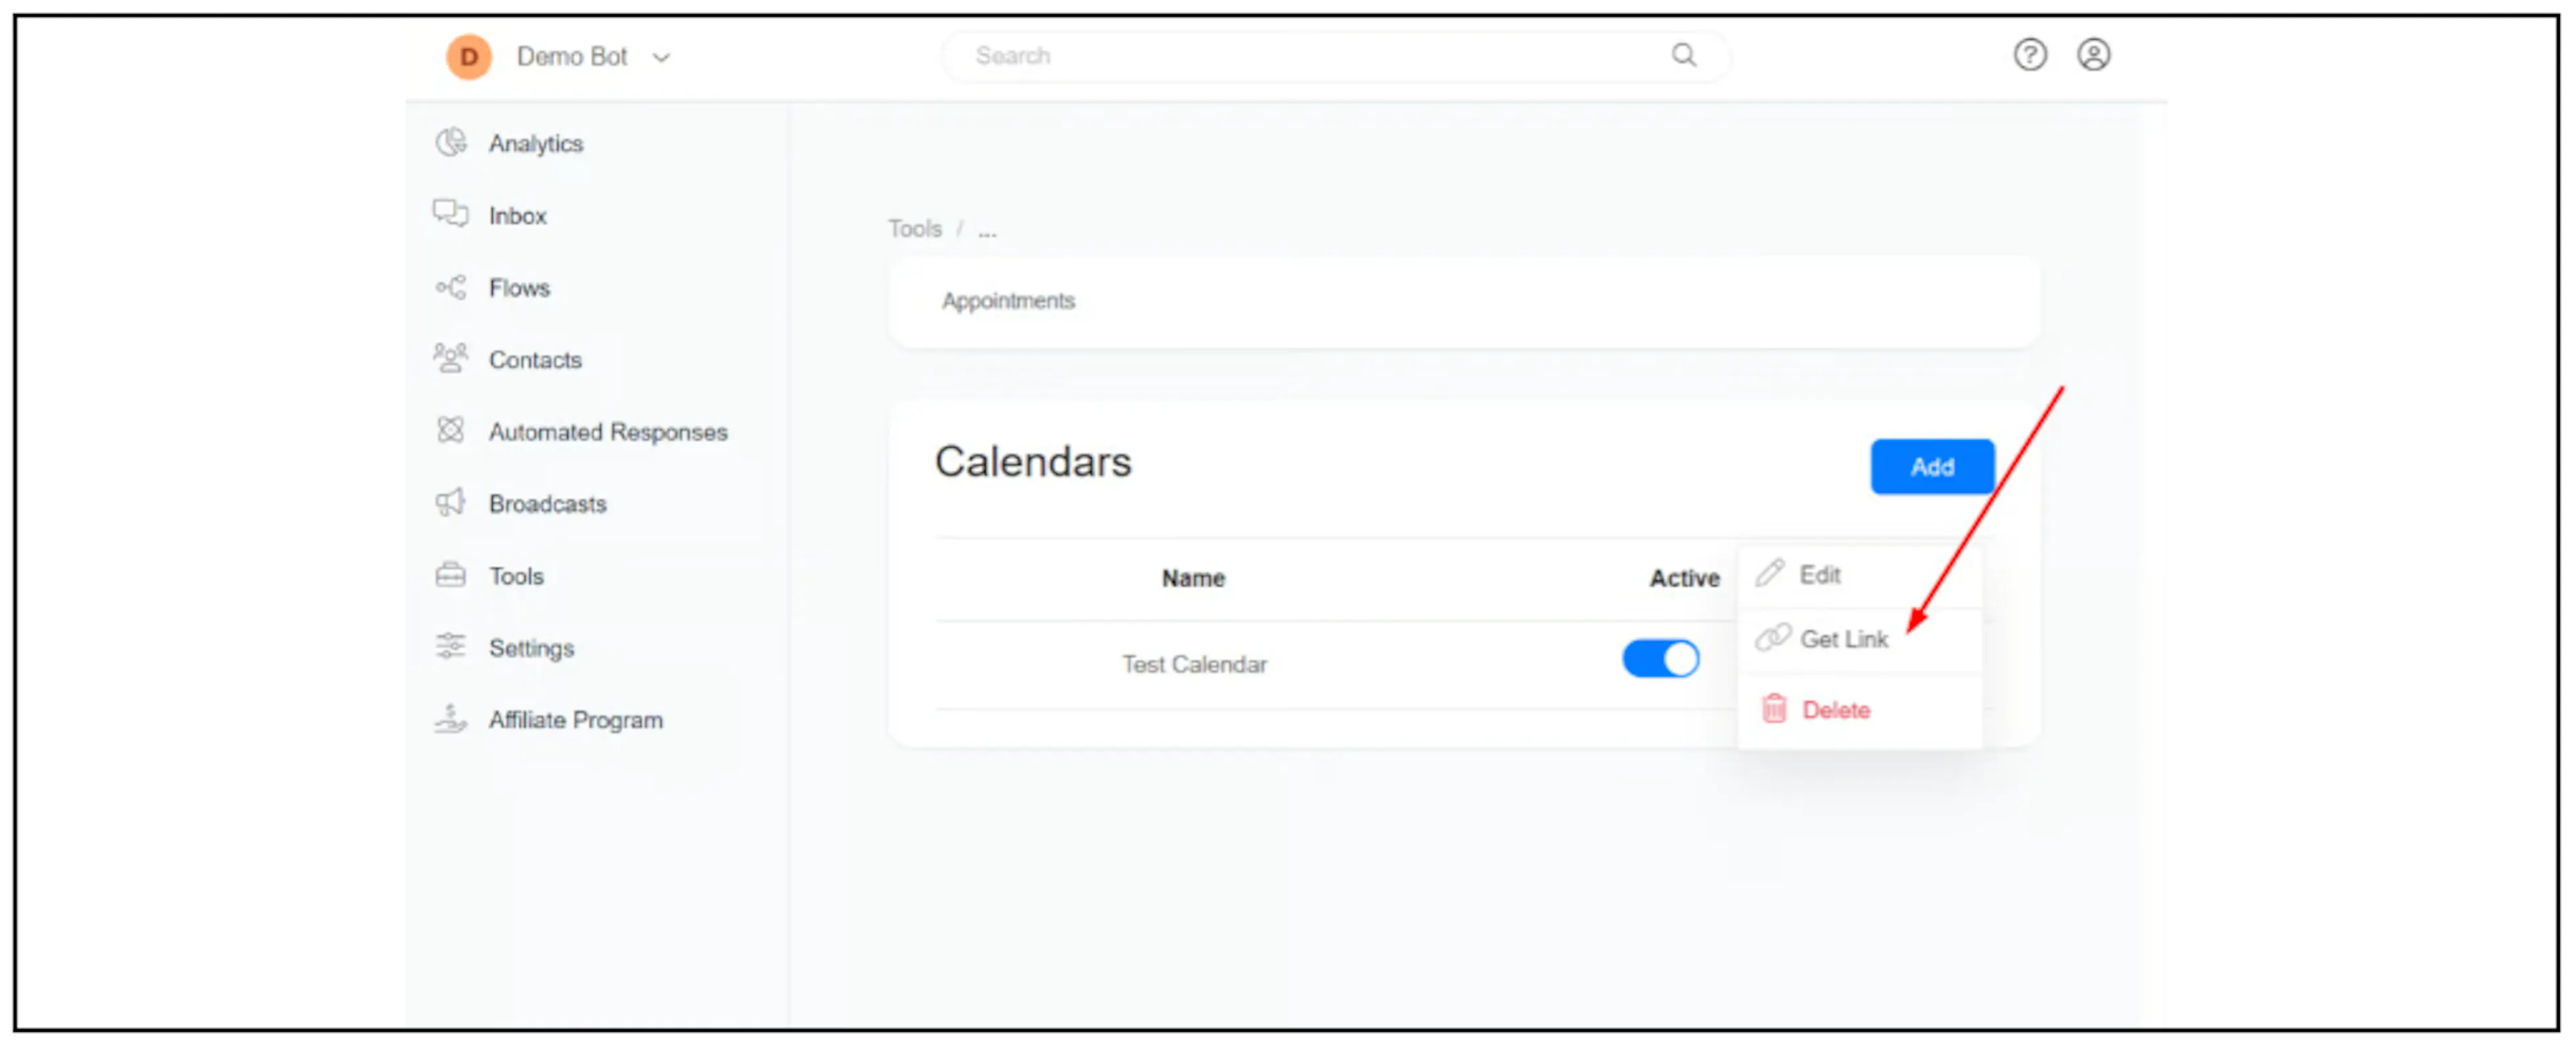
Use the link in a message button on channels that support opening a website. For channels that do not, send it as a text link.
From the Inbox, the calendar icon opens the appointment dialog. Choose the calendar and use Send Calendar Link to send its link to the contact. Review the selected calendar before sending.
View appointments
Open Tools > Appointment Scheduling > Appointments to review scheduled appointments. The earlier guide also labels this menu Appointment Schedule; follow the matching control in your interface.
Before sharing widely, check the booking result, displayed time zone, connected-calendar sync and confirmation/reminder delivery with sample data. Contact support if the controls or integration options differ in your account.